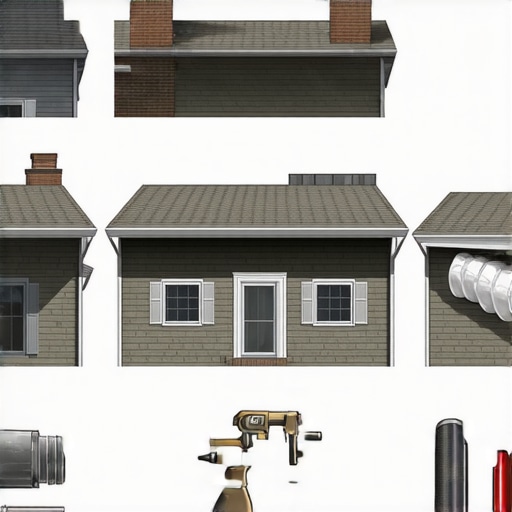
I have spent three decades watching water rot out the bones of houses from the inside out. Most folks think a gutter is just a piece of metal that catches rain, but to an engineer, it is the first line of defense in a complex water management system. When you decide to upgrade to a system featuring hidden hanger systems or high-capacity leader box gutters, the most dangerous part of the job is not the height; it is the demolition of the old, rusted-out mess currently clinging to your fascia. If you yank those old troughs off with brute force, you are going to rip the zip-strip off your vinyl siding or dent your expensive aluminum cladding. I have seen homeowners turn a simple weekend upgrade into a five-figure siding replacement job because they did not respect the mechanical connection between the metal and the house.
The Anatomy of a Failure: A Foundation Warning
I remember a job in the late nineties on a beautiful limestone Victorian in eastern Pennsylvania. The homeowner called me because their basement smelled like a damp cave and the front porch was visibly tilting toward the street. I walked the perimeter and found the culprit: a single, disconnected downspout from an old sectional system. For ten years, every gallon of water from two thousand square feet of roof had been dumped directly into the soil at the corner of the house. The hydrostatic pressure had literally pushed the foundation wall inward by two inches. This is why drainage is not a luxury; it is a structural necessity. When we began the demo, we realized the previous installer had used six-inch spikes driven straight through the gutter and into the rafter tails. Removing those without cracking the brittle, aged siding required a level of surgical precision most contractors today simply do not possess. We are talking about managing flow velocity and surface tension before the first drop ever hits the ground.
“Downspouts shall be sized based on the rainfall intensity of the region and the roof surface area.” – International Plumbing Code, Section 1106
Method 1: The Surgical Spike Extraction
Most old systems are held up by the dreaded spike and ferrule method. These are ten-inch nails driven through the outer rim of the gutter, through a spacer tube, and into the wood fascia. Over years of seasonal expansion and contraction, the metal spikes work themselves loose, but the friction remains high. To demo these without destroying your siding, you cannot just use a crowbar. The physics of leverage will force the back of the tool against your siding, leaving a permanent crease. Instead, you must use a heavy-duty cat’s paw or a specialized nail puller. Slide the tool under the head of the spike and place a sacrificial block of wood between the tool and the fascia. This redistributes the force. If the spike is stubborn, do not pull harder; use a hacksaw blade to cut the spike behind the gutter. This prevents the ‘kickback’ effect where the gutter suddenly drops and gouges the wall. Remember, even during demo, you are managing the structural integrity of the soffit.
Method 2: Scoring the Sealant Membrane
Old gutters are often glued to the house by decades of paint, caulking, and organic sludge. If you pull a gutter that is paint-bonded to the fascia, you will take the wood grain right off with it. I always carry a sharp utility knife to score the entire length of the gutter-to-fascia interface. You need to break that chemical bond. This is especially true if you are transitioning to powder-coated gutter finishes which require a perfectly smooth surface for a flush fit. When we talk about ice dam prevention, we need that back edge of the gutter to sit tightly against the drip edge. If there is leftover caulk or jagged wood from a messy demo, you create a gap. During a freeze, water will find that gap, wick upward through capillary action, and begin rotting your roof deck. This is why the ‘rip and flip’ method used by cheap crews is a recipe for a rot disaster.
Method 3: Managing the Weight of Organic Sludge
A fifty-foot run of gutter filled with wet oak leaves and shingle grit can weigh over two hundred pounds. If you release the hangers at one end, the weight of the debris will cause the entire run to buckle and twist. That twisting metal will act like a giant pair of tin snips against your siding. Before you even touch a tool, you must clean the gutters. This is also a great time to evaluate your future needs for greenhouse gutter collection or foam gutter inserts. Once the trough is empty, we use temporary support straps or ‘third-hand’ poles to hold the weight while we unscrew the hidden hanger systems. It is about controlling the descent. Gravity is a constant, but we can negotiate with it through proper rigging. If you are working on patio cover gutters, this is even more critical, as those structures often lack the heavy framing of a primary residence.
“Gutters and downspouts shall be maintained in good repair and free from obstructions.” – International Property Maintenance Code, Section 304.7
Method 4: The Leader Box and Elbow Disconnect
The downspouts, or ‘leaders’ as we call them in the trade, are usually the most battered part of the system. They are often screwed into the siding with heavy-duty straps. To remove these without leaving gaping holes in your cladding, you must identify the fastener type. If they are zip-screws, a high-torque impact driver is your friend. If they are rivets, you must drill them out. Never, under any circumstances, should you pull a downspout strap out with a hammer claw. You will mushroom the siding. Once the leaders are down, evaluate the transition to the underground drainage. Are you using splash blocks or a pop-up emitter? If you are in a hurricane-rated installations zone, your downspouts need more than just a couple of straps; they need to be structurally anchored to resist high-wind uplift. A loose downspout in a storm is a six-pound aluminum whip that will shred your windows.
Method 5: The Fascia Inspection and Prep
The demo is not finished until the fascia is prepped for the new install. Once the old metal is gone, I look for ‘shadowing’ or soft spots. If the wood is soft, even the best lifetime gutter guarantees won’t save you because the hangers won’t have anything to bite into. We check the pitch of the fascia board itself. A common mistake is assuming the house is level. It almost never is. We want a slope of at least one-quarter inch for every ten feet of run toward the downspout. We also inspect the miter joints at the corners. If the previous system leaked at the miter, the soffit is likely water-damaged. This is the moment to fix it. We are not just replacing a gutter; we are restoring a perimeter seal. We ensure the end cap of the new system will sit flush and that the drip edge properly directs water into the center of the trough, preventing the dreaded ‘back-flow’ that ruins paint jobs.
Conclusion: The Value of Precision
Demolishing an old gutter system is the first step in a long-term strategy to protect your home. Whether you are installing heavy-duty systems for ice dam prevention or looking for the aesthetic appeal of powder-coated gutter finishes, the quality of the removal dictates the success of the installation. Water is a patient enemy. It will find the one screw hole you didn’t seal or the one section of fascia you didn’t prep. By following these five surgical demo methods, you ensure that your siding remains pristine and your foundation stays dry for the next quarter-century. Respect the flow, manage the weight, and never underestimate the destructive power of a single gallon of misplaced rain.
Comments are closed.