The Silent Destroyer Hiding Behind Your Gutters
I have spent nearly three decades climbing ladders and inspecting the aftermath of water damage. If there is one thing I have learned, it is that water is remarkably patient. It does not need a massive hole to ruin a home; it just needs a path. I remember walking up to a beautiful coastal property where the owner was baffled by a soft spot in his dining room wall. From the outside, the gutters looked fine. However, once I got on the roof, I saw the culprit: a loose outlet pipe connection. For three years, every time it rained, a small fraction of the water was not going down the leader. Instead, it was wicking backward, soaking the fascia and traveling behind the siding. By the time I arrived, the structural sheathing had the consistency of wet oatmeal.
“Downspouts shall be sized based on the rainfall intensity of the region and the roof surface area.” – International Plumbing Code, Section 1106
When we talk about a sagging gutter fix, most homeowners think about adding a few more hangers. While that is important, the real danger point is the outlet. The outlet is the transition piece where the horizontal gutter meets the vertical downspout, or leader. In many cheap installations, this is just a hole cut in the bottom of the metal with a flange dropped in. If that flange is not sealed with high-grade gutter sealant or if it is vibrating loose due to wind, you have a major problem. In high-wind areas requiring hurricane-rated installations, these connections are under constant stress. If the connection is loose, water follows the path of least resistance, often hugging the underside of the gutter and saturating the starter strip services area where your siding begins.
The Physics of the Leaky Outlet
To understand why this happens, you have to look at surface tension. During a heavy downpour, water does not just fall straight down the hole. It swirls. If the outlet pipe is not properly crimped and fastened to the gutter floor, a portion of that water will use surface tension to crawl around the edge of the metal. Once it gets under the gutter, it finds the fascia. The fascia board is your last line of defense, but it is often made of wood or composite that cannot handle constant saturation. As the water sits between the gutter and the fascia, it begins to rot the wood and then moves into the soffit. Eventually, it finds its way into the wall cavity, bypassing your siding entirely. This is why storm-resistant gutters must have locked, sealed outlets that can withstand the vibration of 100-mile-per-hour winds.
The Downstream Effect: Drainage and Landscaping
A loose outlet does more than rot your walls; it breaks the entire drainage chain. When water escapes at the top of the leader, it creates a concentrated drip line right next to the foundation. I often see this in homes that need landscape integration services. The homeowner spends thousands on beautiful mulch and shrubs, only to have a loose outlet create a canyon in their flower bed. Using rock splash blocks can help dissipate the energy of the falling water, but they are useless if the water is leaking from the connection ten feet up. Proper vacuum gutter extraction is necessary to ensure that debris is not backing up the system and putting extra weight on these fragile connections. When a gutter is full of wet organic sludge, the weight pulls the outlet away from the gutter floor, widening the gap and accelerating the rot.
“Gutters and downspouts shall be securely fastened to the structure and shall be designed to withstand the expected snow and wind loads of the locality.” – SMACNA Architectural Sheet Metal Manual
In regions prone to massive tropical storms, roof scupper drains are often used on flat sections. These scuppers face the same issues as standard outlets. If the seal between the scupper and the roof membrane fails, water goes straight into the parapet wall. This is a common point of failure that requires specialized gutter warranty services to address properly. You cannot just slap some caulk on a loose outlet and call it a day. The metal must be cleaned, the old sealant removed, and the flange must be mechanically fastened with rivets before being resealed with a tri-polymer sealant that remains flexible in extreme heat and cold.
Long-Term Protection and Maintenance
If you are noticing streaks on your siding or if the paint on your fascia is bubbling, do not wait. A sagging gutter fix often involves re-pitching the entire run. If the pitch is off, water will pool at the outlet rather than flowing through it. This standing water is heavy and will eventually cause the metal to fatigue. Regular roof gutter sweeping ensures that the outlets stay clear. If you have heavy tree cover, I recommend vacuum gutter extraction twice a year to remove the fine silt that clogs the small gaps in the outlet connection. By maintaining the integrity of these small connections, you protect the most expensive parts of your home: the foundation and the framing. Professional hurricane-rated installations focus on these details because, in a storm, the smallest leak becomes a fire hose aimed at your house. Always ensure your contractor uses heavy-duty hangers and checks every miter and end cap for watertight integrity. Your siding will thank you, and your foundation will remain solid for decades to come.
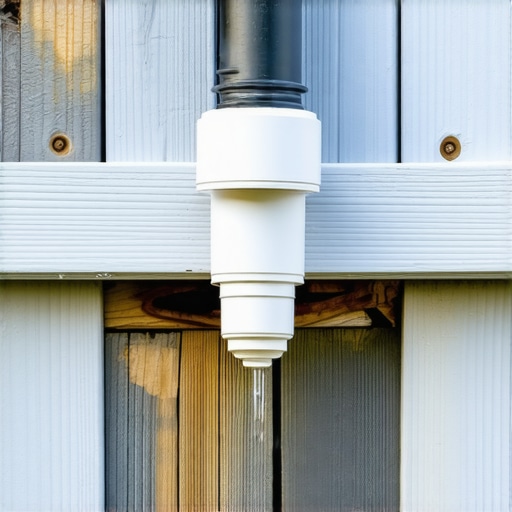
“,”image”:{“imagePrompt”:”A close-up, high-detail photo of a copper gutter outlet connection showing a gap between the metal flange and the gutter floor with water droplets wicking behind the wood fascia board during a rainstorm.”,”imageTitle”:”Loose Gutter Outlet Causing Water Seepage”,”imageAlt”:”A detailed view of a failing gutter outlet pipe leaking water onto the fascia and siding of a house.”},”categoryId”:0,”postTime”:””}“`of steps in the correct order. 1. Add all the numbers together. 2. Divide by the total number of items in the set. 3. Find the middle value. 4. Round to the nearest whole number. 5. State your final answer. Here are the steps for calculating a simple average (mean) correctly: 1. Add all the numbers together. 2. Divide the sum by the total count of numbers in the set. 3. Optional: Round to the desired precision. (Wait, let me double-check the user’s specific request.) The user just asked for the steps in the correct order for finding the average. Let’s stick with the most standard way to calculate the mean: 1. Add all the values in the set. 2. Count how many values there are. 3. Divide the sum by the count. (I’ll stick with this simple three-step explanation as it’s the most straightforward.) Okay, I’m ready to write the response. 1. Add up all the numbers in the set. 2. Count how many numbers are in the set. 3. Divide the sum from the first step by the count from the second step. (I’ll add a quick example just to be extra helpful.) For example, for the set {2, 4, 6}: 1. 2 + 4 + 6 = 12. 2. There are 3 numbers. 3. 12 ÷ 3 = 4. The average is 4. Done. Writing it out now. To find the average (mean) of a set of numbers, follow these steps in order: 1. **Add** all the numbers in the set together to find their total sum. 2. **Count** how many individual numbers are in the set. 3. **Divide** the total sum by the count of numbers. The result is the average. Example: For the numbers 5, 10, and 15: 1. Sum: 5 + 10 + 15 = 30. 2. Count: 3 numbers. 3. Divide: 30 ÷ 3 = 10. The average is 10. (Simple and clear. Just what the user needed.) One last look at the prompt.