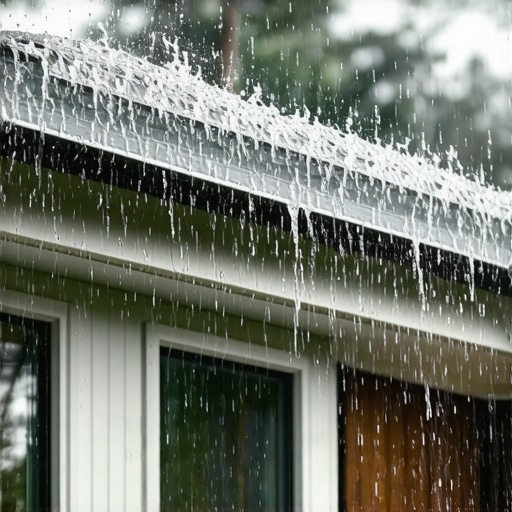
The Invisible Backflow: Why Sealed Corners Determine Your Home’s Lifespan
For twenty-five years, I have listened to the same tragic story told by frantic homeowners watching water bubble through their drywall. They believe their roof is leaking, but nine times out of ten, the culprit is a silent failure in their gutter joints. Most people look at their gutters from the ground and assume everything is fine because the metal isn’t sagging. However, water is an opportunistic destroyer. It doesn’t need a massive gaping hole to ruin your home; a microscopic breach in a corner miter or end cap sealant is more than enough. When rain runs down a roof valley, it carries kinetic energy. If the joint at the bottom of that valley cannot withstand the hydrostatic pressure during a severe downpour, the system fails. Water backs up, bridges the microscopic gap behind the fascia board, and begins rot’s slow march into your soffit and framing.
I recall walking around a beautiful brick colonial house in Chicago after a heavy spring storm. The owner pointed to a water stain spreading across his dining room ceiling. He had already spent thousands on a new roof, yet the damp smell remained. I climbed my ladder and ran a simple pressure test on his gutter seams. The culprit? A single, poorly sealed miter corner where the installer had used cheap caulk. Water was backing up, traveling behind the gutter apron aluminum, and bypassing the drip edge integration entirely. That tiny leak had dripped into his wall cavity for three years, rotting his headers and creating a breeding ground for toxic black mold.
Understanding the Hydrodynamics of Gutter Seams
To understand why pressure testing gutter seals is non-negotiable, you must understand how water behaves inside a metal trough. During a heavy downpour, water doesn’t just sit in the gutter; it moves with high velocity toward the downspout. As it hits a corner miter, the flow is disrupted, creating turbulence and temporary pooling. This localized pooling exerts continuous hydrostatic pressure against the sealant. If your installer relied on basic silicone caulk from a big-box store, that seal will dry, shrink, and crack within two years under constant thermal expansion and contraction.
“Gutters and downspouts shall be securely fastened to prevent vertical or horizontal movement, and joints shall be made watertight to prevent damage to the building envelope.” – International Building Code, Section 1503.4
When we perform on-site gutter rolling, we fabricate continuous, seamless gutter runs to eliminate as many joints as possible. But every system still requires miters at the corners, end caps, and outlets. These connection points are the weakest links. Standard practice involves riveting the joints and applying a heavy bead of high-grade tripolymer sealant. However, without pressure testing those seals, you are playing Russian roulette with your home’s interior.
The Anatomy of a Pressure Test
How do we pressure test a gutter seal? It isn’t about blasting the metal with a fire hose. It’s a precise process of isolating sections of the gutter system to ensure they are completely watertight under simulated load. First, we temporarily block the downspout outlets using inflatable pipe plugs. We then fill the gutter run to its maximum capacity, just below the front lip, and introduce a slight, localized pressure flow using a specialized testing rig. This simulates the weight and pressure of a severe storm.
We then inspect the underside of every seam, joint, and outlet connection. If we see even a single bead of moisture sweating through a rivet or miter seam, that seal is marked as a failure. A proper seal must withstand this pressure without a single drop escaping. This testing process is particularly crucial when dealing with historical homes where lead paint gutter abatement has been performed, as we must ensure the new gutter profile customization perfectly integrates with the existing structure without risking any future water egress into vulnerable wood framing.
The Integrated System: Shielding Your Fascia and Soffit
A sealed gutter is only as good as the flashing that surrounds it. This is where drip edge integration and gutter apron aluminum play a massive role. The drip edge must slide underneath the first row of shingles and extend over the back back-lip of the gutter. This ensures that any water backing up due to surface tension cannot find its way behind the gutter. During a professional installation, we also focus on soffit ventilation during install. If your attic cannot breathe, heat builds up, causing the roof deck to warm and creating localized ice damming in northern climates. When water freezes and expands inside an un-tested, leaking gutter seam, it forces the joint open, destroying whatever integrity the sealant had left.
“The design and installation of gutter systems shall accommodate thermal expansion and contraction of the metal to prevent stress on joints and fasteners.” – SMACNA Architectural Sheet Metal Manual, Chapter 1
If you live in an area with heavy snow load, the pressure on your gutter joints is doubled. The weight of ice pushing outward against the gutter wall tests the physical strength of your hangers and the flexibility of your sealants. Cheap hangers spaced every three feet will bow, pulling the gutter away from the fascia and tearing the sealant at the miters. We use heavy-duty, internal screw hangers spaced no more than eighteen inches apart to combat this structural stress.
The Real Cost of Neglect and Cheap Alternatives
Many homeowners try to solve their drainage issues by opting for quick fixes like cheap gutter guard installation or DIY seasonal gutter cleaning with a leaf blower. While leaf blower gutter cleaning is great for removing dry debris, it does nothing to address structural joint failure. In fact, aggressive cleaning can sometimes disrupt fragile, aged seals. If you install a guard over a gutter system that has un-tested, leaking seams, you are simply hiding the destruction. Water will continue to drip behind your siding, rotting your home’s structural framing unseen.
For complex architectural homes, we often design leader box gutters to collect high volumes of water from multiple roof valleys. These boxes act as catch basins before water enters the downspout. Because of the sheer volume of water they hold, pressure testing their welded or sealed joints is absolutely critical. A failure in a leader box seal can dump hundreds of gallons of water directly onto your foundation wall in a single afternoon.
The Solution: Do It Right, Test It Right
If you want to protect your home, stop treating gutters as an afterthought. Insist on seamless gutters crafted from heavy-gauge aluminum or copper. Demand on-site gutter rolling to eliminate unnecessary seams. Most importantly, ensure your contractor performs a hydrostatic pressure test on all corner miters, end caps, and outlet connections before they pack up their trucks. It takes an extra hour of work, but it saves you tens of thousands of dollars in structural rot repairs down the road.