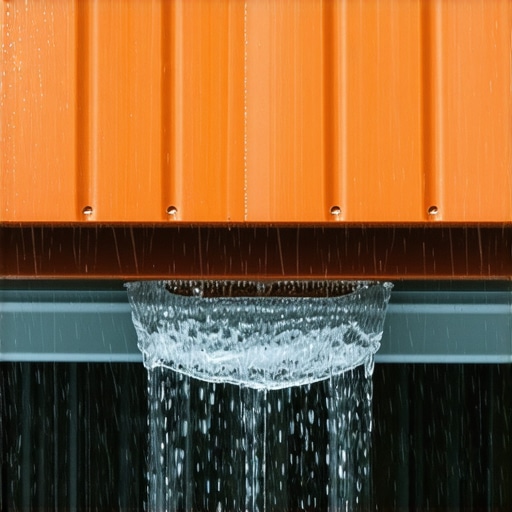
The Anatomy of a Gutter Leak: Why Water Finds a Way
As a veteran gutter and exterior drainage specialist with over a quarter-century of hands-on experience, I have learned one absolute truth: water is a patient, destructive force. It does not sleep, and it is constantly searching for the path of least resistance. In my 25 years of fixing failing drainage systems, the most common battleground isn’t the straight runs of aluminum; it is the joints. Miters, end caps, and expansion seams are the primary failure points where water wages its war against your fascia and foundation.
When a gutter joint fails, the consequences are rarely immediate but always severe. First, the wood fibers of your fascia board absorb the slow, consistent drip. Then comes the wood rot, followed closely by mold spores traveling up into your soffit and attic. Eventually, that unmanaged water pools directly at your home’s foundation, threatening the structural integrity of your entire property. To truly protect your home, you must understand how to engineer, seal, and verify water-tight gutter joints.
The Narrative Matrix: A Costly Lesson in Hidden Drips
I recall walking around a historic property in Ohio where the owner complained of a musty smell in their finished basement. Outwardly, the gutters looked pristine. However, upon climbing my ladder and inspecting the corner miter directly above the dampest basement wall, I found a microscopic failure in the joint seam. For nearly four years, a tiny, virtually invisible stream of water had bypassed the downspout system during every heavy rain. This single failed seam dumped thousands of gallons of water directly against the foundation wall, causing the concrete block to bow inward by over an inch. A simple gutter leak repair, ignored or unnoticed, turned into a twenty-thousand-dollar foundation excavation. This is why proving your joints are water-tight is not optional; it is the difference between a dry home and structural ruin.
“Gutters and downspouts shall be jointed and secured in a manner that ensures water-tightness and structural stability under maximum anticipated design loads.” – SMACNA Architectural Sheet Metal Manual
The Science of Seams: Why Gutter Sealant Application Fails
Most homeowners, and unfortunately many amateur handymen, believe that fixing a leaky joint is as simple as squiring a tube of cheap silicone over the seam. This is a critical mistake. Standard silicone sealants do not adhere well to wet aluminum, nor do they possess the thermal expansion capabilities required to survive seasonal temperature swings. When the sun beats down on your metal roof, the gutter system expands. In the dead of winter, it contracts. If your sealant lacks elastomeric properties, it will shear away from the aluminum within months, creating a hidden capillary channel for water to escape.
To achieve a professional-grade seal, you must use a high-performance tripolymer or polyurethane gutter sealant. Before applying a single bead, the joint must be surgically clean. This means scraping away every trace of old, crusty sealant, wire-brushing the metal to remove oxidation, and wiping the entire area down with denatured alcohol. Applying fresh sealant over old sealant is a guaranteed way to ensure a leak within one season.
The Hydro-Geographic Reality: Surviving the Frozen North
Because we are addressing a climate prone to severe freeze-thaw cycles, the mechanical forces acting upon your gutter joints are extreme. In northern climates, water pools in improperly pitched gutters, freezes, and expands. This ice accumulation exerts tremendous outward pressure on your seams. Additionally, heavy snow sliding off a shingle roof gutter starter puts immense vertical weight on the system. If your fascia gutter mounting isn’t perfectly secured with heavy-duty screw-in hangers spaced every 12 to 18 inches, the entire gutter will twist, tearing your sealed joints apart. A sagging gutter fix is not just about aesthetics; it is about restoring the proper pitch (one-quarter inch of fall for every ten feet of run) so that water drains instantly instead of pooling and freezing over your joints.
The Multi-Step Protocol to Prove Your Gutter Joints Are Water-Tight
How do you verify that your gutter joints are actually water-tight before the next torrential downpour? You do not wait for a storm. You perform a systematic pressure and flow test. Here is the exact checklist I use on every commercial flat roof gutters and residential system I install or repair.
Step 1: The Dry-Joint Visual and Mechanical Inspection
Before introducing water, inspect the physical assembly of the joint. In seamless aluminum systems, miters are joined using strip miters or box miters. Ensure the aluminum pieces overlap in the direction of the water flow. If the uphill piece is tucked under the downhill piece, surface tension will draw water directly into the seam, regardless of how much sealant you apply. Verify that all mechanical fasteners (pop rivets or stainless steel zip screws) are tight and placed away from the lowest point of the water channel.
“Joints in sheet metal gutters shall be soldered, welded, or sealed with approved sealants to prevent leakage.” – International Plumbing Code, Section 1106.3
Step 2: The Static Water Dam Test
This is the ultimate test of joint integrity. Temporarily block the downspout outlet using an inflatable test plug or a clean rag wrapped in a plastic bag. Fill the gutter run with water until the level rises to within a half-inch of the front lip. Let the water sit undisturbed for thirty minutes. Walk the perimeter below the gutters, paying close attention to every joint, miter, and end cap. If you see even a single bead of moisture forming on the exterior of a seam, your joint has failed. Mark the exact spot with a grease pencil for localized gutter leak repair.
Step 3: The Dynamic Flow and Overshoot Test
Once your static test passes, remove the plug and simulate a heavy rainstorm using a high-pressure hose nozzle directed at the roof slope. Watch how the water transitions from the shingle roof gutter starter into the gutter trough. Look for “overshoot” at the corners. During heavy downpours, water velocity can carry it right over the outside edge of a miter. If you observe this, you may need to install splash guards or transition to larger, high-volume gutters and specialized erosion control downspouts to direct the water safely away from your landscaping.
Evaluating Long-Term Protection: Guards and Maintenance
Even the most perfectly sealed joint will fail if the system is allowed to fill with organic debris. When leaves, twigs, and pine needles clog your leaders, the entire gutter system fills with heavy, stagnant water. This puts immense hydrostatic pressure on your seams. Professional gutter guard installation is often recommended to prevent this issue. However, you must choose the right system for your specific micro-environment. While micro-mesh gutter guards are excellent at keeping out fine debris like pine needles and oak tassels, they must be paired with properly reinforced hangers to handle the additional weight load of winter ice.
If your existing gutter system is structurally compromised, with rusted seams, rotting fascia, or warped runs that cannot hold a pitch, it may be time to move past temporary repairs and invest in professional gutter replacement services. Modern seamless gutter installations eliminate mid-run joints entirely, leaving only the essential end caps and corner miters to seal, which drastically reduces your future leak risk.
Proactive Water Management is Non-Negotiable
Your home is likely your largest financial investment. Allowing water to bypass your drainage system because of a leaky five-dollar joint is a gamble you cannot afford to take. By selecting high-quality elastomeric sealants, ensuring proper pitch and hanger spacing, and rigorously testing your seams with static and dynamic water tests, you can keep your foundation dry, your fascia solid, and your basement free of mold. Take control of your home’s water management system today, and stop water from finding a way in.