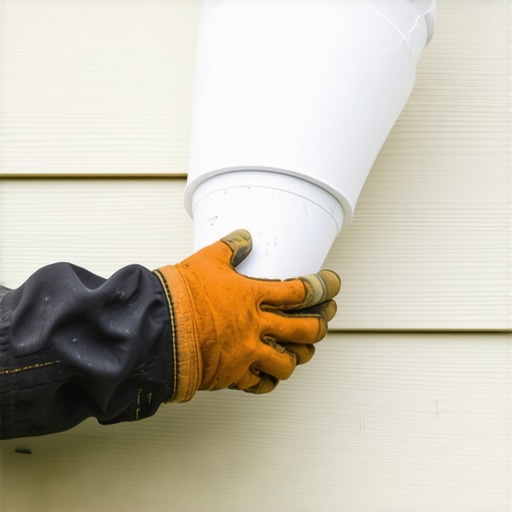
I walked around a house last October where the corner of the foundation had sunk nearly two inches into the soft clay. The homeowner was looking at a fifteen thousand dollar piering job. The culprit? A single cracked downspout elbow at the base of a leader that had been dumping five hundred gallons of concentrated roof runoff directly into the soil for three consecutive seasons. Water is a patient destroyer. It does not need a flood to ruin a home; it just needs a small opening and time. When that elbow cracks, usually due to a combination of UV degradation and the relentless expansion of trapped ice, the hydro-geography of your property changes instantly. Instead of water being directed away from the structure, surface tension pulls that liquid back toward the foundation or, worse, allows it to seep into the fascia board and soffit ventilation during install, leading to rot that you will not see until a gutter bracket pulls free from the mushy wood.
The Physics of the Cracked Elbow
In the trade, we talk about flow velocity and laminar flow. When water moves through a vertical leader, it gains speed. As it hits an elbow to transition around an offset or toward a splash block, that velocity creates pressure. If there is a hairline fracture in the seam of a cheap, thin-gauge elbow, the water does not just drip out. Because of capillary action and the sheer volume of a heavy downpour, the water bridges the gap behind the metal. It begins to track along the exterior of the pipe, eventually finding its way to the fascia. Professional gutter replacement services often see this on houses where the original installer used 2×3 inch leaders instead of the superior 3×4 inch high-capacity versions. The smaller pipe chokes during a ‘gully washer,’ causing water to back up and put immense pressure on every joint and miter.
“Downspouts shall be sized based on the rainfall intensity of the region and the roof surface area.” – International Plumbing Code, Section 1106
If you are in a region prone to severe weather, you need hurricane-rated installations. This means using heavy-duty gutter apron aluminum and ensuring that every elbow is secured with stainless steel zip screws rather than the old-fashioned spikes and ferrules that eventually pull out of the wood. In northern climates, the stress on these elbows is even higher. Gutter de-icing services are often required because when an elbow freezes solid, the expanding ice exerts hundreds of pounds of pressure per square inch. This is precisely when the metal seams split or the plastic becomes brittle and snaps. If you see a crack, you have less than ten minutes of work to prevent a massive headache.
The Ten-Minute Swap: Step-by-Step
To perform this repair properly, you need a 1/4-inch nut driver, a fresh tube of high-grade gutter sealant, and a new powder-coated gutter finishes elbow that matches your existing system. First, back out the zip screws connecting the elbow to the downspout and the gutter outlet. Do not lose these screws; you will need them to maintain the structural integrity of the leader. Once the old elbow is out, inspect the end of the downspout for any crimping issues. This is a good time to check your shingle roof gutter starter and ensure no debris is clogging the drop. If the old metal is twisted, use a pair of needle-nose pliers to straighten the flange. We advocate for eco-friendly gutter disposal, so make sure that old aluminum goes to a scrap recycler rather than a landfill.
Slide the new elbow onto the outlet. Always remember the rule of water flow: the upper piece must always fit inside the lower piece. If you reverse this, water will leak at the joint regardless of how much sealant you use. This is common ‘amateur’ physics that leads to wet basements. Once seated, drive your screws back in. If the holes are stripped, you may need to move the screw location slightly or use a larger diameter fastener to ensure it can withstand the vibration of heavy rain. For those looking for long-term peace of mind, installing gutter flow sensors can alert you to a blockage or a leak before it manifests as a damp spot in your drywall.
“All joints in gutter and leader systems shall be made watertight and shall be installed to provide for expansion and contraction.” – SMACNA Architectural Sheet Metal Manual
The Importance of Proper Integration
A downspout elbow is only as good as the system it is attached to. If your soffit ventilation during install was compromised by a poorly placed gutter, or if you lack a proper gutter apron aluminum edge, water will find its way behind the gutter and rot the rafter tails. This is why we often suggest financing for gutter installs when a homeowner has a failing system; it is cheaper to replace the whole run than to repair a foundation. The elbow is the most stressed point of the drainage path. It handles the change in direction and the brunt of the water’s kinetic energy. If you are constantly replacing elbows, you likely have a pitch issue. The gutter should have a slope of 1/4 inch for every 10 feet of run. If the pitch is too shallow, water sits in the gutter, adds weight, and puts constant stress on those elbows and hangers.
Finally, look at where that water goes after it leaves the elbow. A splash block is the bare minimum. Ideally, you want a leader extension that carries water at least six feet away from the foundation. In heavy forest areas, the organic sludge that builds up in these elbows can act like a dam, holding moisture against the metal and accelerating corrosion. Regular maintenance is the only way to ensure your home stays dry. Water is the primary enemy of the built environment. By spending ten minutes swapping a five-dollar part, you are defending your most valuable asset from the silent, persistent threat of erosion and rot.