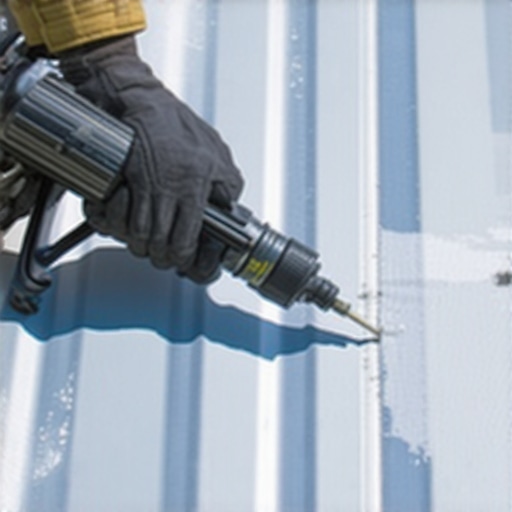
The Dripping Threat: Why Downspout Integrity Matters
As a veteran gutter specialist with over 25 years of hands-on experience, I view water not as a gentle resource, but as an aggressive erosive force. When a hole develops in your aluminum corrugated downspout, or leader, it is not just an aesthetic issue. It is a concentrated stream of water targeted directly at your home’s foundation or siding. During a heavy downpour, hundreds of gallons of water cascade down your roof. If that water escapes mid-transit through a small hole in your downspout, it bypasses your entire drainage system, rotting your fascia boards, soaking your soffits, and pooling at your foundation.
I remember walking around a property in Portland where the owner ignored a nickel-sized puncture in an aluminum leader for three winters. Over time, the concentrated high-velocity stream saturated the soil right next to the crawlspace. Eventually, the hydrostatic pressure cracked the basement wall, causing a slow, musty leak that smelled of rotted earth and cost thousands to remediate. All of this damage stemmed from a tiny hole that could have been patched in thirty minutes. Before you look into professional gutter removal services or call for help with complex gutter leak repair, let us look at how you can seal these punctures yourself.
Understanding the Physics of Downspout Water Flow
Aluminum corrugated downspouts are engineered with ridges to rigidify the metal and help channel water downward efficiently. However, these very ridges create turbulence and trap small debris, which can lead to localized corrosion if water pools in flat spots. Water is a polar molecule; it exhibits strong surface tension. When it leaks through a hole in a vertical leader, it doesn’t just drop straight down. It clings to the outer metallic surface, creeping backward toward your home’s siding and pooling behind the trim boards.
“Downspouts shall be sized based on the rainfall intensity of the region and the roof surface area. System design must ensure water is discharged away from the structural foundation to prevent soil saturation and structural shifting.” International Plumbing Code, Section 1106
In regions with heavy seasonal storms, the volume of water moving through a 2×3 or 3×4 leader is immense. A tiny hole under hydrostatic pressure behaves like a high-pressure nozzle. It sprays water outward, splashing back onto your cladding. Let us go through the step-by-step process of repairing these compromised sections to keep your exterior envelope dry and secure.
The Step-by-Step Patching Method for Corrugated Aluminum
To repair a hole in an aluminum downspout, you must account for the corrugated profile. A flat patch will not adhere properly because it cannot seal the ridges. Here is how to achieve a permanent, watertight repair.
Step 1: Clean and Prep the Metal Surface
You cannot patch dirty metal. Use a wire brush and a coarse scouring pad to scrub the area around the hole, removing all dirt, oxidation, and loose paint. Wipe the area down with rubbing alcohol or acetone to remove remaining grease or organic film. Let it dry completely. Proper gutter cleaning and preparation are vital before applying any sealant.
Step 2: Fabricate a Matching Patch
Cut a patch from a scrap piece of aluminum corrugated downspout. The patch must be at least one inch larger than the hole on all sides. Crucially, the patch must share the exact corrugated profile as the damaged area so that the ridges nest together. If you do not have scrap metal, you can cut a patch from a flat aluminum flashing sheet and carefully bend it with pliers to match the profile of the downspout ridge.
Step 3: Apply High-Grade Polyurethane Sealant
Do not use cheap silicone. Silicone expands and contracts at a different rate than aluminum, causing it to peel away within a couple of seasons. Instead, use a high-performance exterior polyurethane or tripolymer sealant. Apply a generous bead around the perimeter of the hole on the downspout, and another bead on the underside of your patch.
Step 4: Secure the Patch Mechanicaly
Press the patch firmly over the hole, ensuring the corrugations nest together tightly. Use short, rust-resistant stainless steel sheet metal screws or blind rivets to secure the patch. Do not use long screws that project far into the interior of the leader, as these will catch wet leaves and pine needles, creating internal clogs that require automated cleaning systems or manual clearing later. Two screws, one on each side of the repair, are usually sufficient.
Step 5: Seal the Edges and Screws
Smooth the squeezed-out sealant around the perimeter of the patch with a gloved finger to create a clean, watertight bevel. Dab a small amount of sealant over the screw heads to prevent water from weeping through the threads. Let the sealant cure for at least 24 hours before the next rainfall.
When Patching Isn’t Enough: Structural System Failures
Sometimes a patch is merely a temporary band-aid on a system that is failing structurally. If your downspouts are riddled with multiple holes, or if the metal has thinned from years of acid rain, patch repairs will not last. In these cases, replacing the affected section or upgrading the entire system is necessary. Property owners with unique roofing materials often require tailored drainage solutions, such as a shingle roof gutter starter to establish proper water flow paths, or specialized shake roof gutter protection to prevent cedar oils from corroding the metal below. On agricultural outbuildings, executing a robust barn gutter repair ensures heavy runoff does not wash out animal stalls.
“All rainwater harvesting and exterior drainage systems must be constructed of materials that are compatible with the roofing material to prevent galvanic corrosion and accelerated degradation.” SMACNA Architectural Sheet Metal Manual
For high-end residential properties, a copper gutter installation offers unmatched longevity and durability, naturally resisting rust and organic growth. When replacing downspouts, always terminate them properly. Dropping water onto a concrete walkway will cause erosion; instead, direct the discharge onto robust rock splash blocks or connect the system directly into a subterranean French drain to channel water far away from your foundation.